
Pixel Art guide
Image to Minecraft Pixel Art: A Practical Building Guide
Learn how image to Minecraft pixel art conversion turns photos and artwork into a practical block grid with better sizing, palettes, and editing choices.
Minecraft Image Tools Team ·
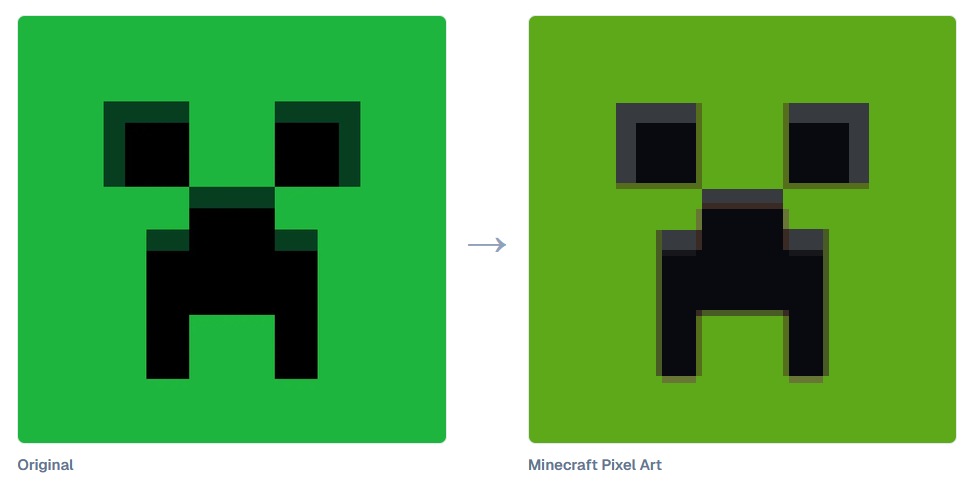
Turning an image to Minecraft pixel art is not just a matter of making a picture look blocky. If you want to build the result in Minecraft, the converted image needs a practical size, a usable block palette, a readable grid, and material information you can follow during construction.
Minecraft Image Tools turns a source picture into a block-based design that you can preview, edit, check for material counts, and save as a visual building reference. This guide explains the full workflow, from choosing the source image to using the finished grid in-game.
If you are still deciding what a converter should produce, start with the broader Minecraft image converter guide. It explains how source choice, output type, scale, and palette shape the result before you commit to a Pixel Art workflow.
What Image to Minecraft Pixel Art Conversion Actually Does
A normal image can contain thousands or millions of pixels, subtle gradients, shadows, texture, and tiny details. A Minecraft build has a much stricter structure: every visible cell in the design must correspond to a block position.
An image-to-block workflow therefore has to simplify the source in two important ways.
First, the image is reduced to a smaller grid. A 64-block-wide design, for example, has only 64 cells across. The height follows the proportions of the source image.
Second, each cell is matched to a supported Minecraft block color. Instead of producing arbitrary digital colors, the conversion uses block choices that can be counted and referenced while building.
That difference is what makes the result more useful than a generic pixelation filter. You are not only creating a visual effect; you are creating a block-by-block plan.
Choose Pixel Art or Map Art Before You Start
This guide focuses on flat block Pixel Art for walls, floors, signs, logos, and murals. In that workflow, you choose a Width, the tool derives Height from the source proportions, and each design cell becomes a block position.
If your goal is one in-game map rather than a block mural, use the Minecraft Map Art Generator. Its fixed 128 × 128 Java Edition 1.21.5 Flat Map Art workflow uses map-specific colors and block choices. Keeping the two outputs separate prevents a general image-to-Minecraft conversion from using the wrong dimensions or palette.
How to Turn an Image Into Minecraft Pixel Art
The actual conversion takes only a few steps. Most of the quality comes from the decisions you make before and after generation.
1. Choose an image that will survive block reduction
Start with a picture that is still recognizable when viewed small. Strong silhouettes, clear edges, useful contrast, and simple backgrounds usually convert more cleanly than crowded scenes full of tiny objects.
Logos, icons, sprites, illustrations, close portraits, symbols, and artwork with large color regions are often good candidates. Detailed photographs can also work, but they may need more resolution or manual cleanup.
If the subject occupies only a small part of the frame, crop the source image before uploading it. Cropping is an image-preparation step rather than a built-in conversion control in the current tool.
2. Pick a practical width
The current Minecraft Image Tools workflow accepts a target width from 1 to 128 blocks, with 64 as a useful starting point. Height is derived from the source image's aspect ratio.
A larger width can preserve more facial features, lettering, edge detail, and small shapes, but it also produces a physically larger build. A smaller width is easier to construct but removes more information from the source.
Do not automatically choose the maximum size. Generate a manageable version first, then increase the width only when an important part of the image becomes too coarse.
The Minecraft Pixel Art Size Guide provides a focused comparison of Width, derived Height, detail, and building effort.
3. Choose the Minecraft block palette
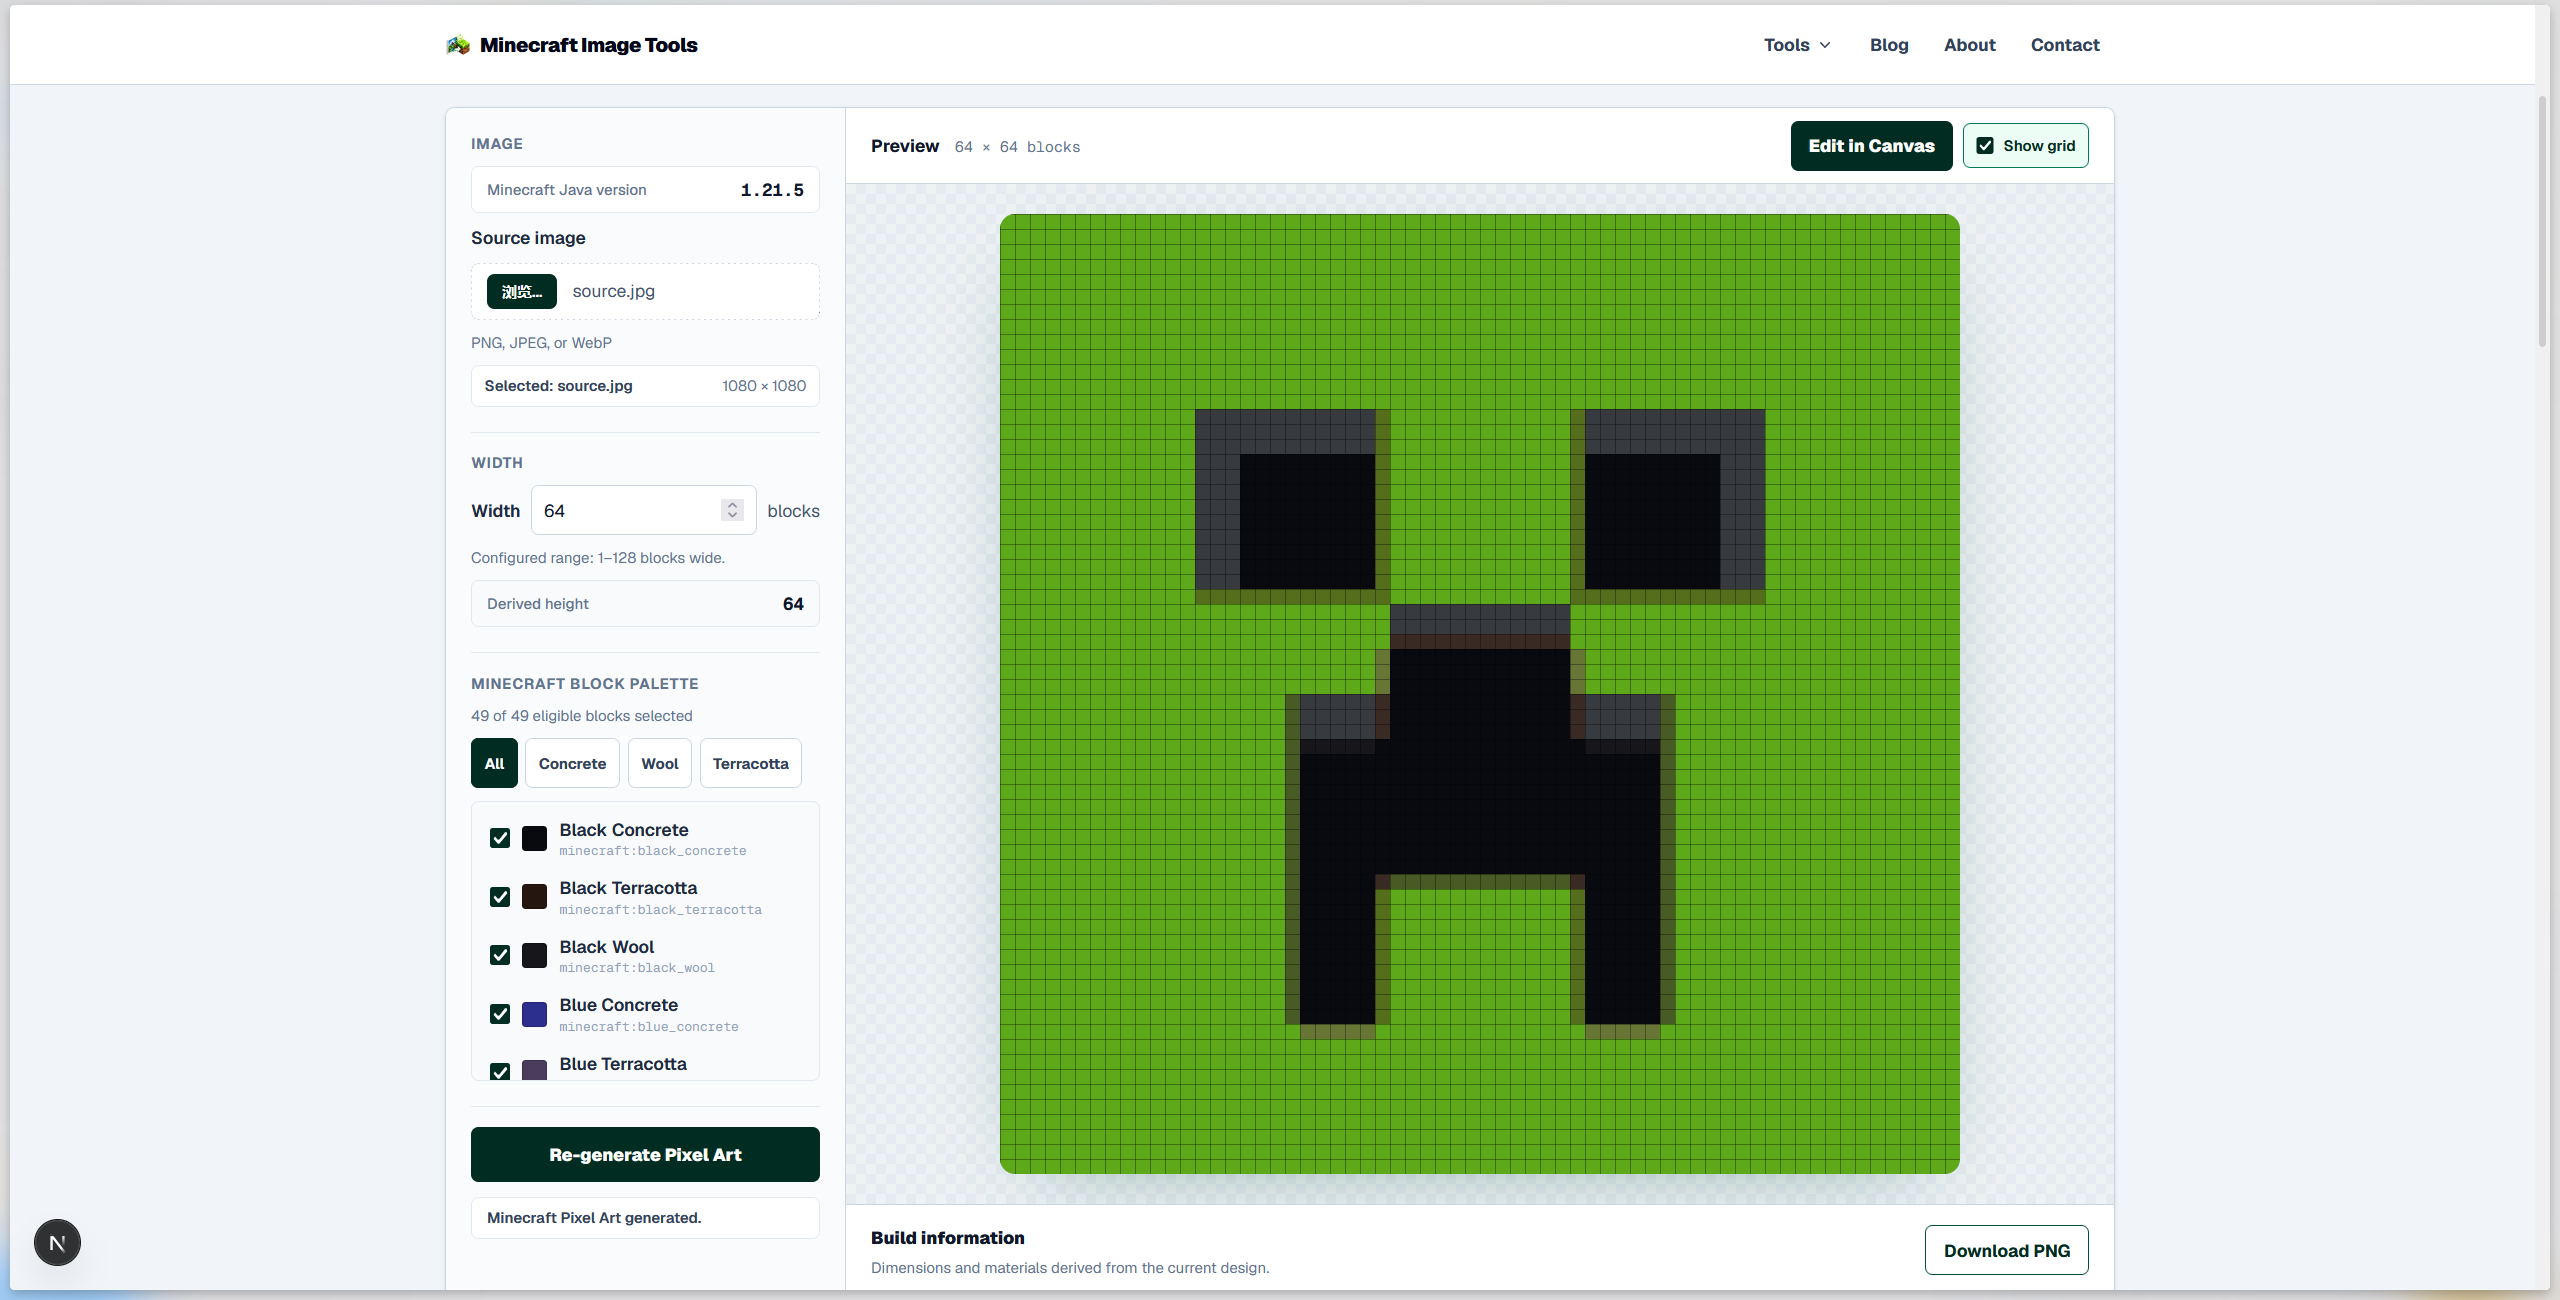
The current production palette contains 49 reviewed blocks for Minecraft Java Edition 1.21.5, using Concrete, Wool, and Terracotta. You can work with the available set or narrow the selection by material family.
Palette choice affects more than color accuracy. A broad palette may give the converter more options for matching the source, while a narrower palette can make the final build easier to gather materials for and visually more consistent.
Use the Minecraft Pixel Art Block Palette Guide when you want to compare the full reviewed palette with a Concrete-, Wool-, or Terracotta-only selection.
4. Generate the design and inspect it from a distance
Open the Minecraft Pixel Art Generator, upload your prepared image, set the width, choose the eligible blocks, and generate the design.
Before looking at individual cells, zoom out and judge the overall silhouette. Is the subject immediately recognizable? Did an important edge disappear? Did two nearby colors collapse into a shape that is hard to read?
If the overall result is wrong, go back to the source, width, or palette. Editing individual blocks is most useful after the basic composition already works.
5. Use the Canvas to correct important details
Automatic mapping cannot know which tiny details matter most to the viewer. A small change around an eye, logo edge, letter, or high-contrast outline can improve recognition far more than dozens of edits to background texture.
The current Canvas lets you Paint and Erase cells, Pick an existing block, search the palette, use Undo and Redo, Pan, Zoom, and toggle the Grid while refining the result.
Treat the generated design as a strong first pass rather than something that has to remain untouched.
6. Review the grid and material counts
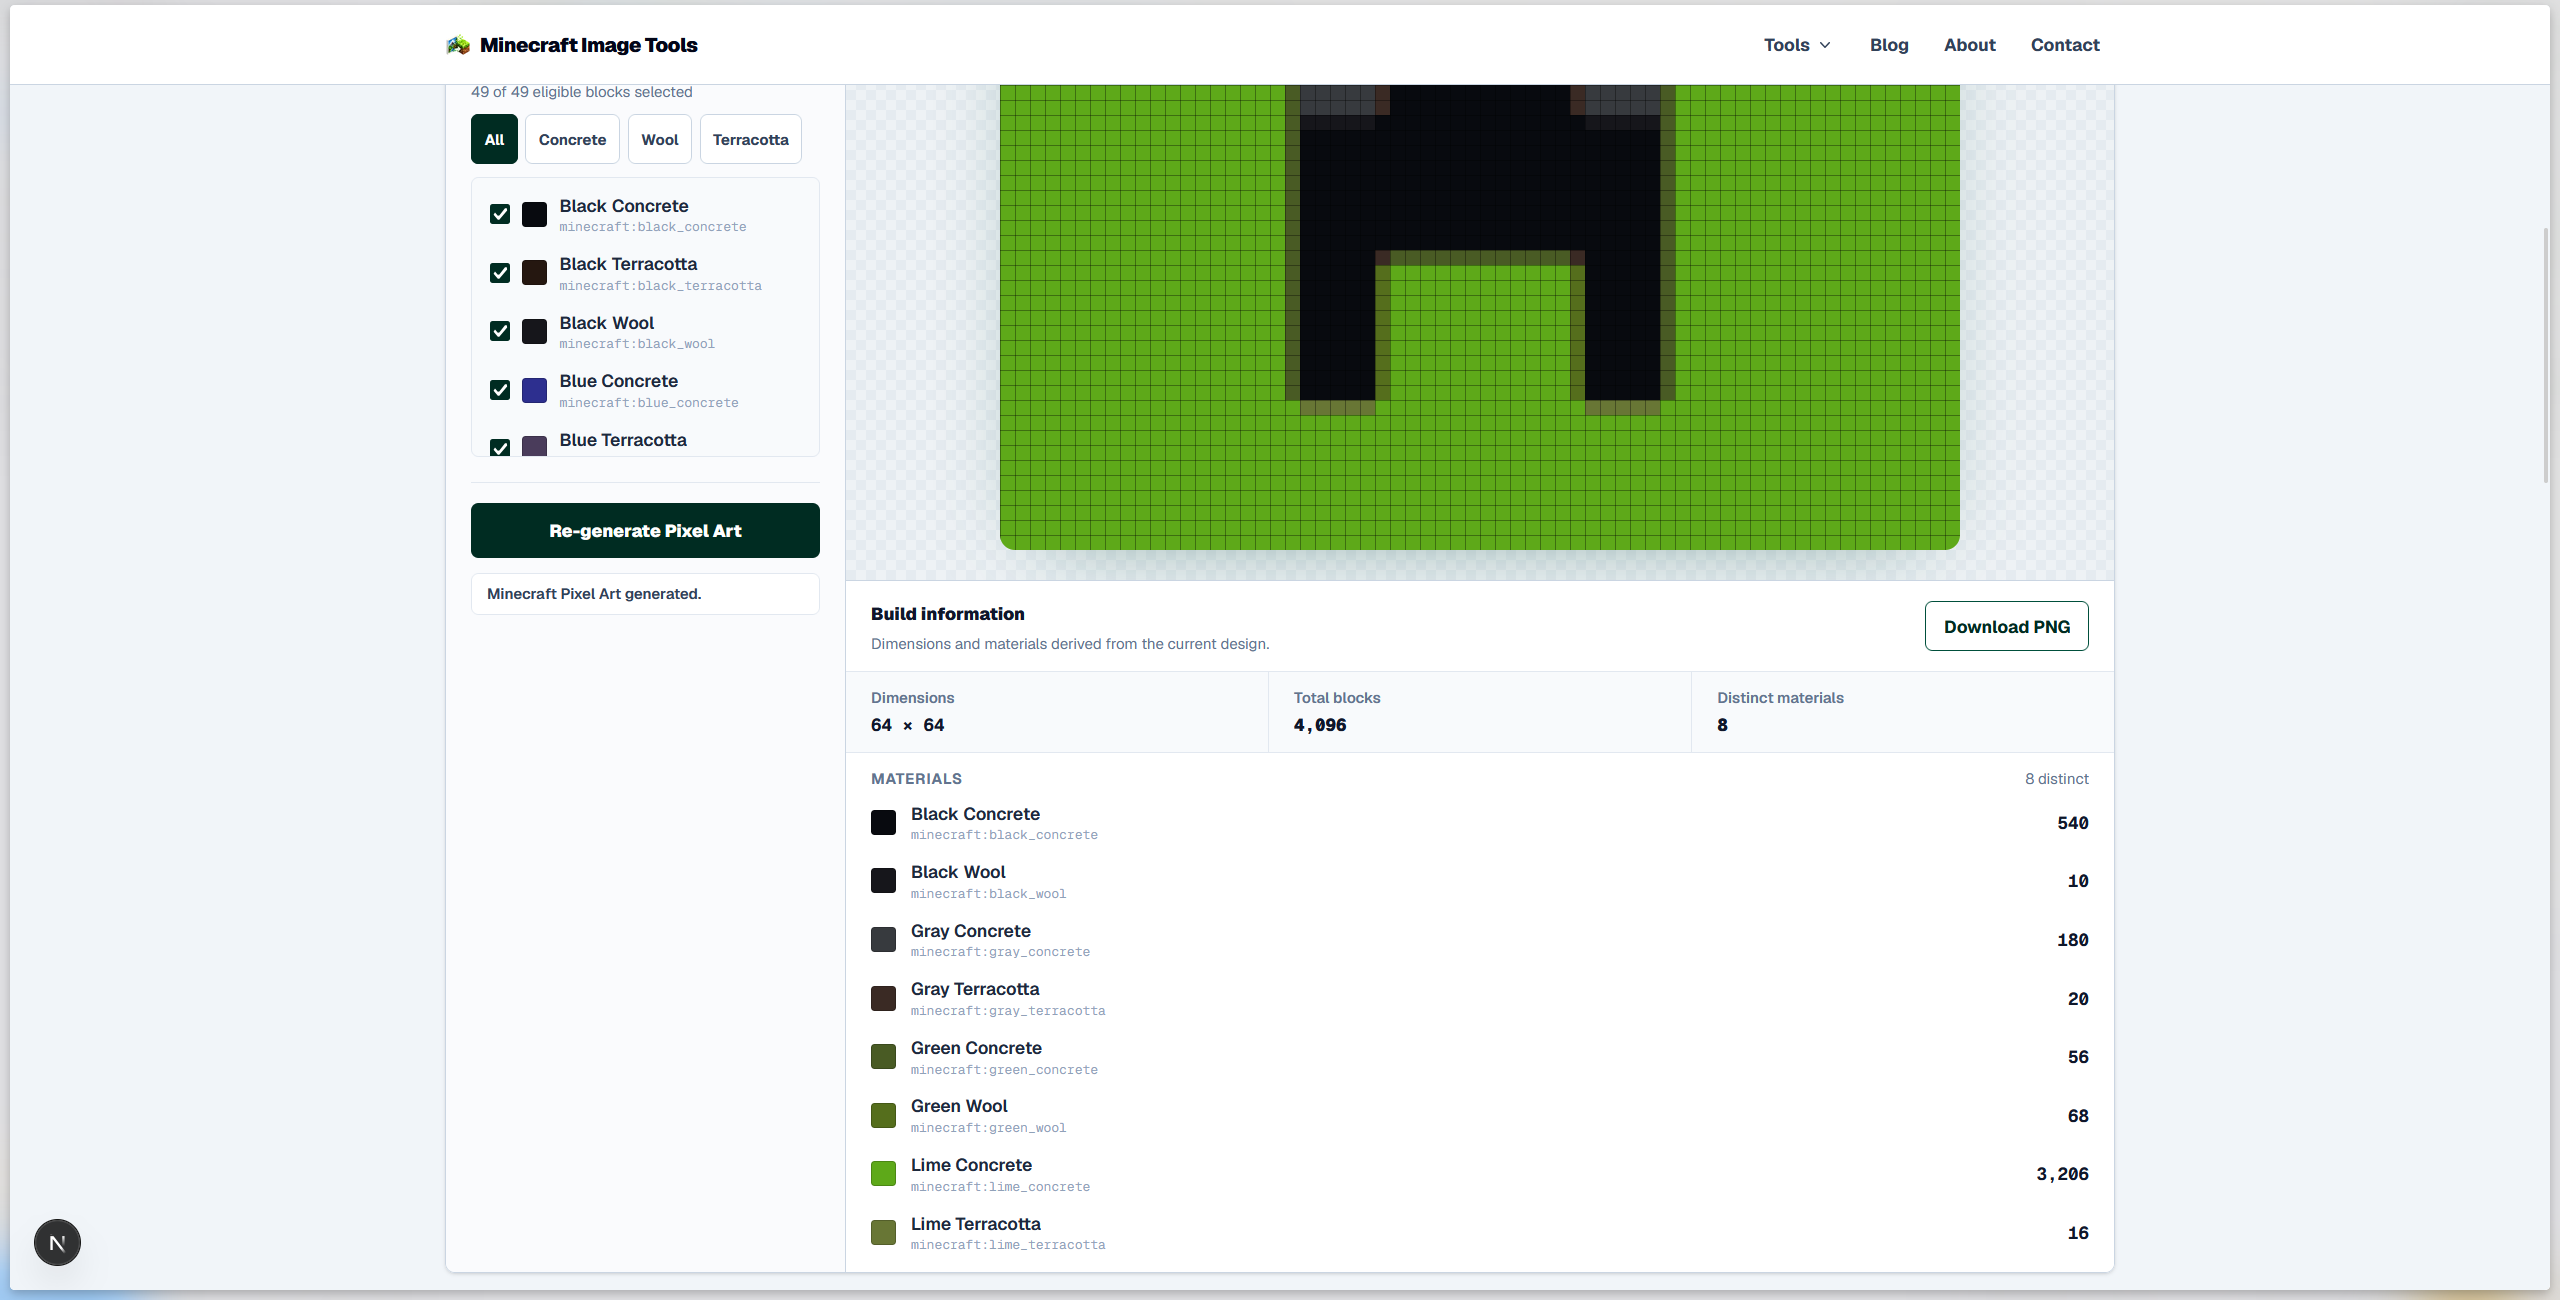
Once the design looks right, check the Build Information. The current tool reports the design dimensions, total placed blocks, distinct materials, and the quantity of each material in the design.
This is the point where the converted image becomes a realistic construction plan. You can see whether the project fits the wall or floor space you have available and whether the material requirements are reasonable before you start building.
Before construction, open the Minecraft Pixel Art Grid guide for a row-by-row method that uses visible cell boundaries and checkpoints without changing the underlying design.
How to Get a Cleaner Result From a Picture
If a picture-to-Minecraft-pixel-art conversion looks noisy, increasing the resolution is not always the best fix. Often, simplifying the source works better.
Try tightening the crop, removing unnecessary background detail, or choosing a palette with clearer separation between important colors. Then compare the converted result at two scales: zoomed out for recognition and zoomed in for individual block choices.
The most useful question is not whether every source detail survived. It is whether the details that define the subject survived.
Exporting Your Minecraft Pixel Art
Once the conversion looks right, you can download the finished pixel art as a PNG image.
The exported image is useful as a visual reference while building in Minecraft, especially when combined with the on-screen grid and material information available in the editor.
Before exporting, check the design at both normal size and a zoomed-out view. Small color changes that look noticeable up close may have very little effect on the finished build.
For manual building, keep the editor open alongside Minecraft so you can use the grid and block palette as your construction reference.
Common Mistakes to Avoid
Starting too large
More cells can preserve more detail, but they also increase the physical dimensions and material requirements of the build. Test a smaller size first and enlarge only when necessary.
Editing before fixing the overall composition
If the subject is too small, badly framed, or unreadable at the chosen width, changing a few blocks will not solve the real problem. Fix the source image or scale first.
Using every available shade by default
A closer color match is not always the most practical build. Limiting the palette can reduce material complexity and sometimes produce a cleaner visual style.
Ignoring the grid until you start building
Review the grid before construction. It makes isolated cells, uneven edges, and awkward shapes easier to notice while changes are still quick to make.
A Simple Workflow for Building the Result
Once the design is finished, the construction process can stay simple:
- Confirm the final width and derived height.
- Review the Material List and gather the required blocks.
- Download the finished PNG, or keep the editor open with the on-screen Grid enabled as your building reference.
- Choose one corner as your starting point.
- Build row by row or divide a larger design into clearly marked sections.
- Compare each completed section with the reference before moving on.
For larger builds, keeping the same direction for every row can reduce counting errors. If you divide the design into sections, finish and check one section before starting the next.
Minecraft Version and Palette Compatibility
The current reviewed production target for Minecraft Image Tools is Minecraft Java Edition 1.21.5. The supported palette contains Concrete, Wool, and Terracotta blocks from that target.
Block availability can differ between Minecraft versions, so check that the materials in your generated design are available in the version you plan to use. The current production scope does not claim Bedrock Edition parity.
Conclusion
A useful image to Minecraft pixel art conversion should make a build easier to understand, not simply make a picture look pixelated. Start with a clear source image, choose a practical width, select a palette you are comfortable building with, inspect the overall result before editing, and review the material counts before construction.
Once the design is ready, use the on-screen Grid together with the exported PNG and Material List as a straightforward block-by-block reference you can keep open while building in Minecraft.
FAQ
Can I turn a picture into Minecraft pixel art in my browser?
Yes. Minecraft Image Tools processes supported source images in the browser. The current workflow accepts static PNG, JPEG, and WebP files.
What size should I use for image to Minecraft pixel art?
There is no single best size. The current generator supports widths from 1 to 128 blocks and uses 64 as a practical starting point. Use the smallest width that keeps the important parts of the subject recognizable while still fitting the scale you want to build.
Can I edit the converted blocks before building?
Yes. The Canvas lets you change individual cells with Paint and Erase, Pick blocks from the current design, search the palette, Undo or Redo edits, and use Pan, Zoom, and Grid controls while refining the result.
Are my images uploaded to the Minecraft Image Tools server?
No. The current product states that source-image processing happens locally in your browser rather than uploading the image to Minecraft Image Tools servers.
Does the tool export a Minecraft structure automatically?
No. The current downloads are visual PNG references. The production tool does not currently export a Schematic, Litematica file, world file, or automatically place blocks in a Minecraft world.
Try the workflow in your browser
Use the current Minecraft Pixel Art Generator with your own image, then edit the result and review its material counts as you follow this guide.
Open Minecraft Pixel Art Generator