
Pixel Art guide
Minecraft Image Converter: Turn Pictures Into Buildable Block Art
Learn how a Minecraft image converter turns photos, logos, and artwork into a practical block grid, with better sizing, palette, and build-planning choices.
Minecraft Image Tools Team ·
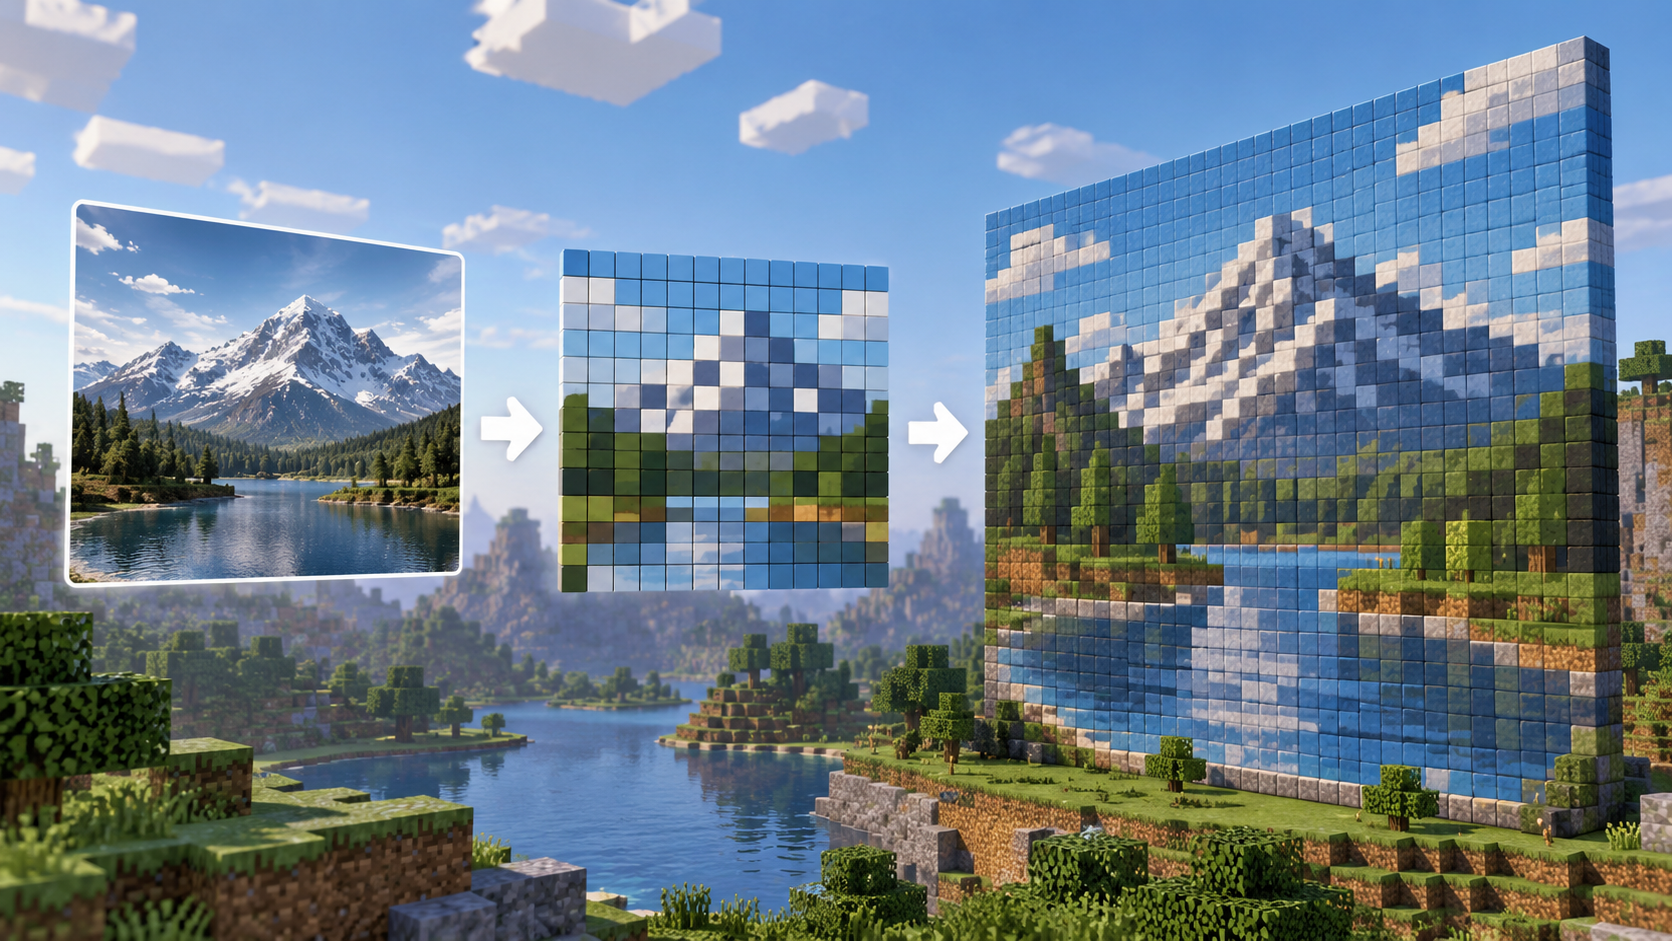
A Minecraft image converter takes an ordinary picture and turns it into a block-sized plan you can recreate in Minecraft. The useful part is not simply making an image look pixelated. A practical conversion gives you a readable grid, a sensible build size, and a block palette that can be translated into something you can actually place in-game.
If you are starting with a photo, logo, sprite, or illustration, the converter is the bridge between the source image and the finished Minecraft build.
Quick Summary
A good conversion workflow is simple: crop the source image, choose the final dimensions in blocks, reduce the colors to a useful palette, inspect the grid, and fix only the details that matter. The goal is not to preserve every source pixel. It is to keep the subject recognizable at Minecraft scale.
If you want the complete wall-art process, continue with the image to Minecraft pixel art guide. The size guide and block palette guide cover the two decisions that most directly change the resulting design.
What a Minecraft Image Converter Actually Converts
A Minecraft image converter first reduces the source picture to a target grid. Each cell in that grid becomes one visible position in the final design, so the grid dimensions determine the physical size of the build.
That means source resolution and build resolution are different things. A 2000-pixel-wide image does not need a 2000-block-wide wall. The picture can be sampled down to a much smaller grid while keeping the shapes that make it recognizable.
The second job is color matching. Photos contain many subtle shades, but a Minecraft build uses a limited set of block colors and textures. The converter approximates each grid cell with a suitable block from the selected palette.
You may also see the same workflow described as an image to Minecraft block converter. The phrase is more explicit, but the task is the same: translate a normal image into a block-by-block plan.
How to Use a Minecraft Image Converter for a Better Build
The most important choices happen before you start placing blocks.
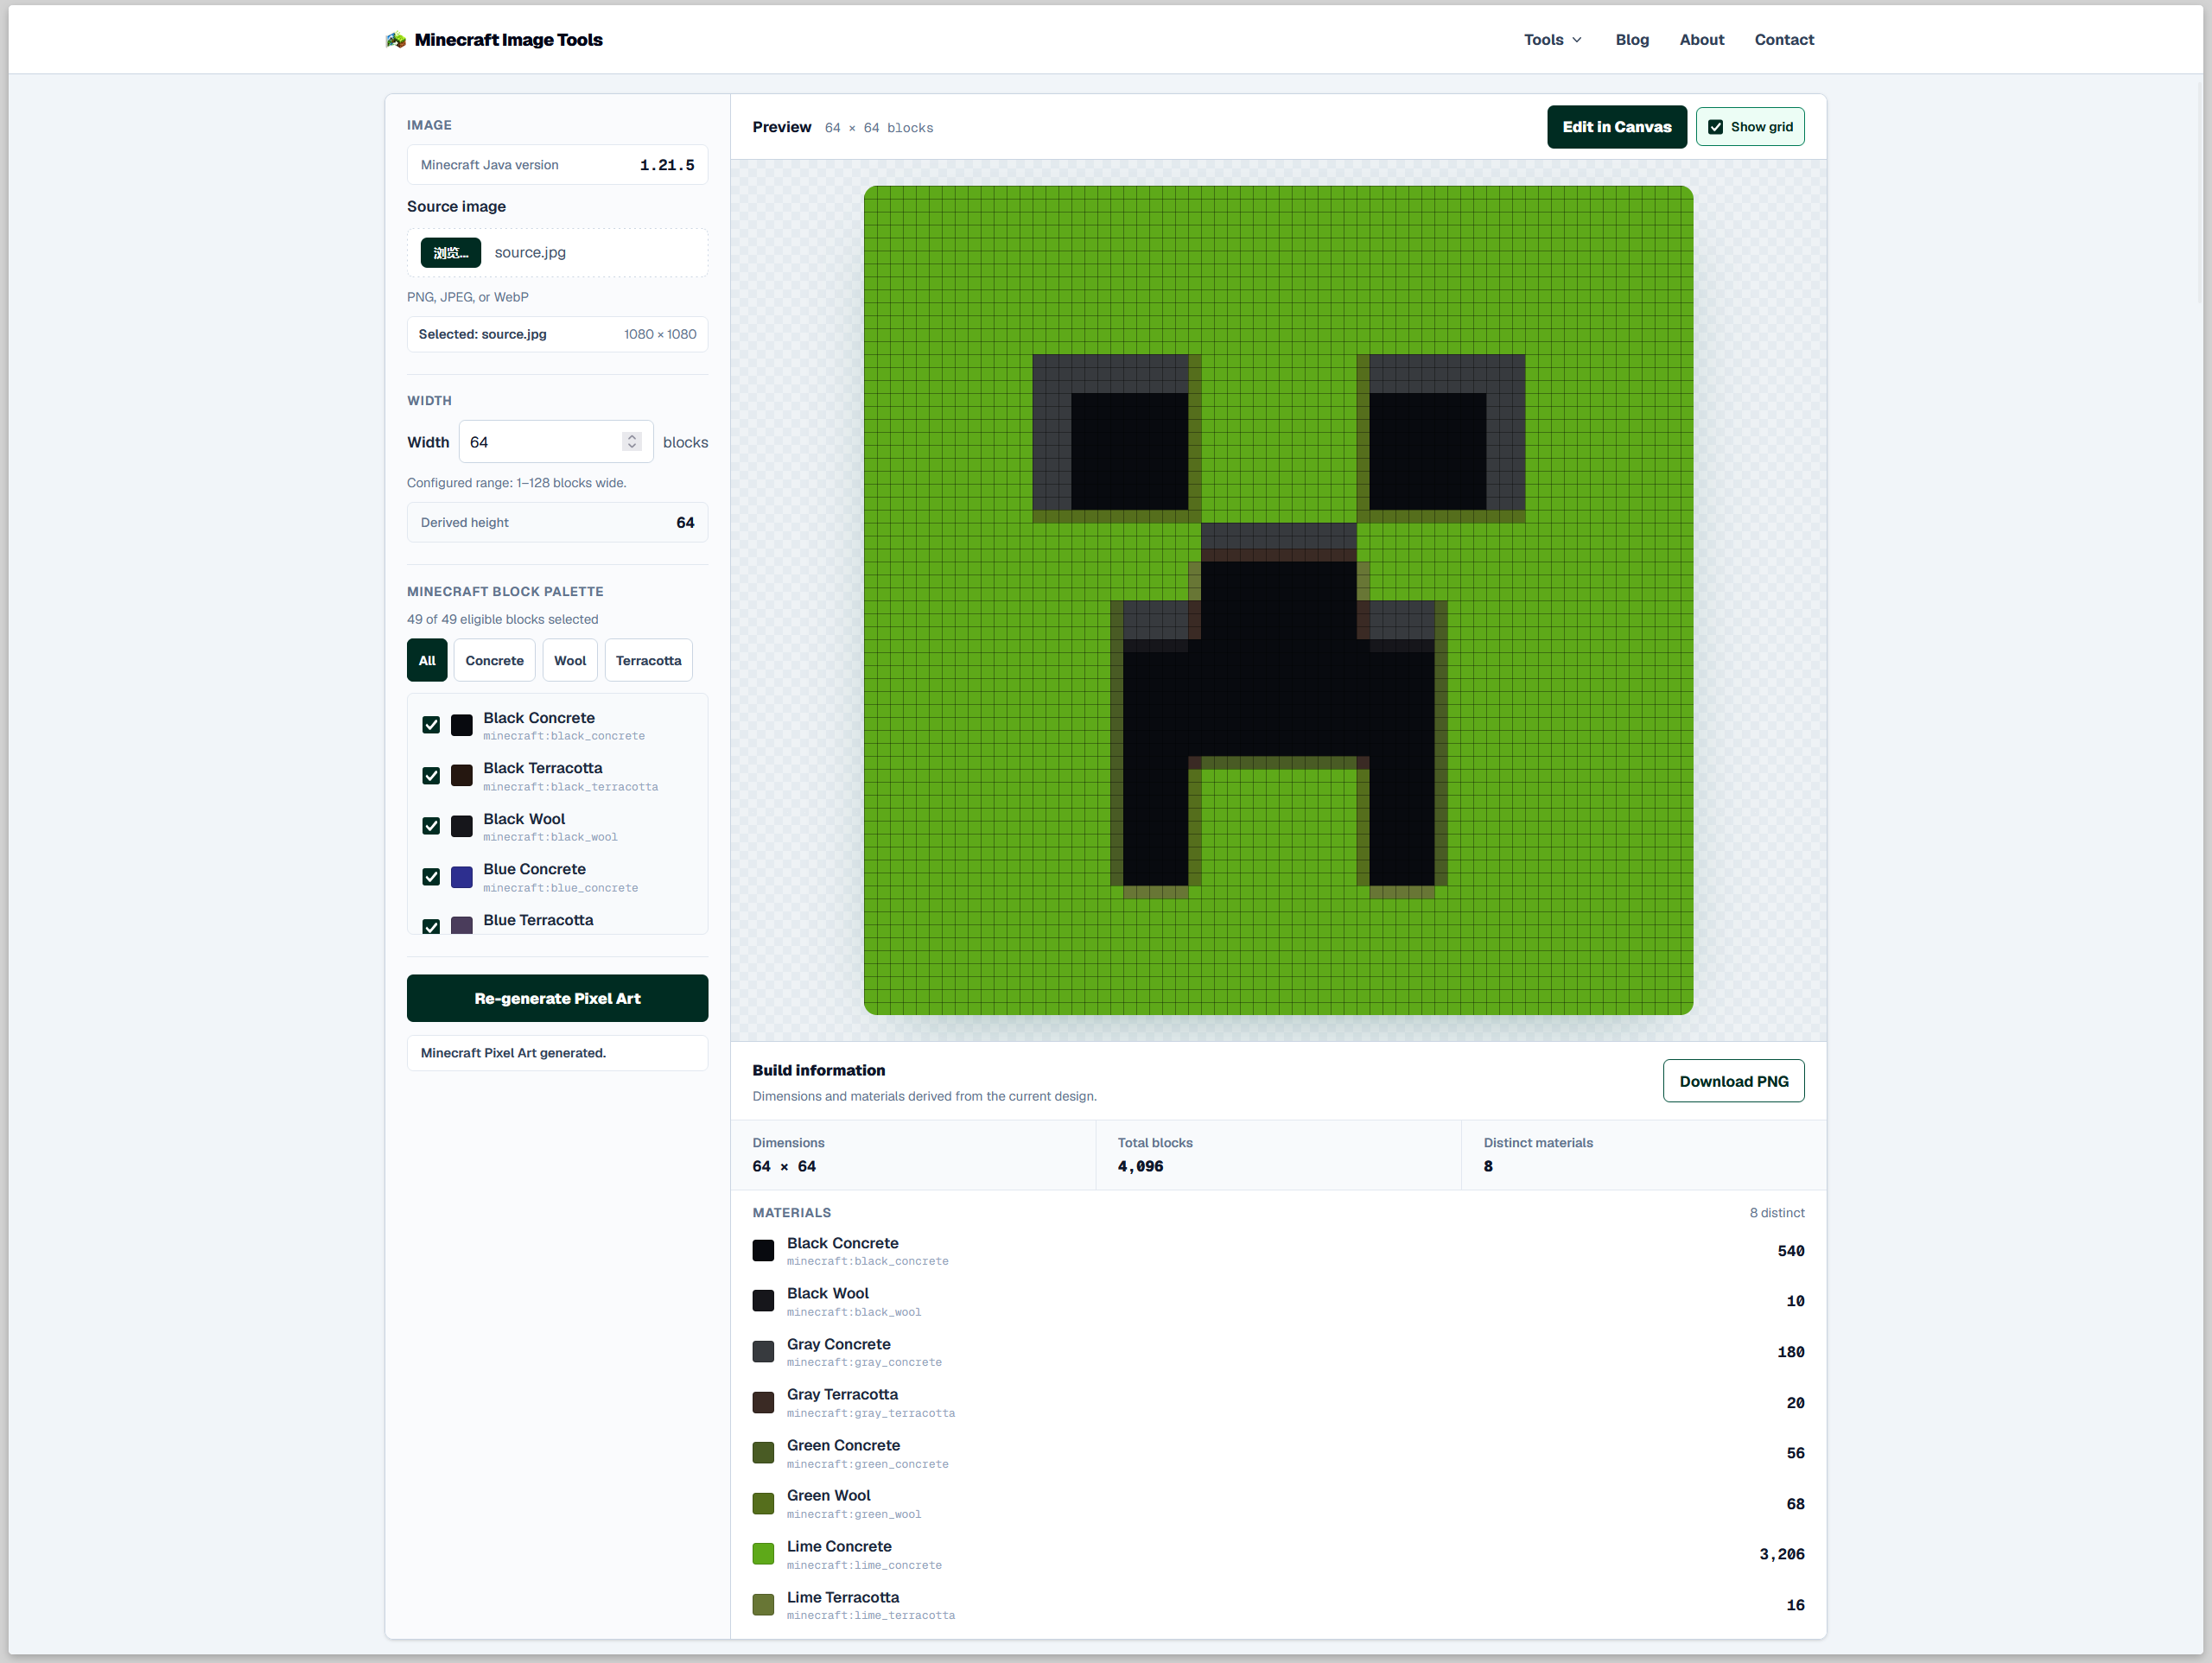
1. Crop around one clear subject
Remove empty margins and distracting background areas. A tightly cropped logo, character, face, or object usually survives reduction better than a wide scene where the subject occupies only a small part of the frame.
2. Choose the final size in blocks
Think about the wall, floor, or display space you actually have. A smaller grid is easier to build but removes detail. A larger grid preserves more edges and small features but needs more materials and more placement time.
If both width and height are doubled, the number of grid cells becomes four times larger. That is why increasing the dimensions should solve a specific readability problem rather than simply make the design bigger.
3. Pick a palette that fits the project
The closest color is not always the best block. Texture, availability, contrast, and the surrounding build can change how a color feels once it is placed in Minecraft.
A clean logo may benefit from a compact, high-contrast palette. A portrait or landscape may need more shades to keep softer transitions. Choose the palette based on the look you want and the materials you are willing to use.
4. Inspect the converted grid from a distance
Zoom out before editing individual cells. If the subject no longer reads clearly, changing a few blocks will not fix the main problem. Adjust the crop or dimensions first.
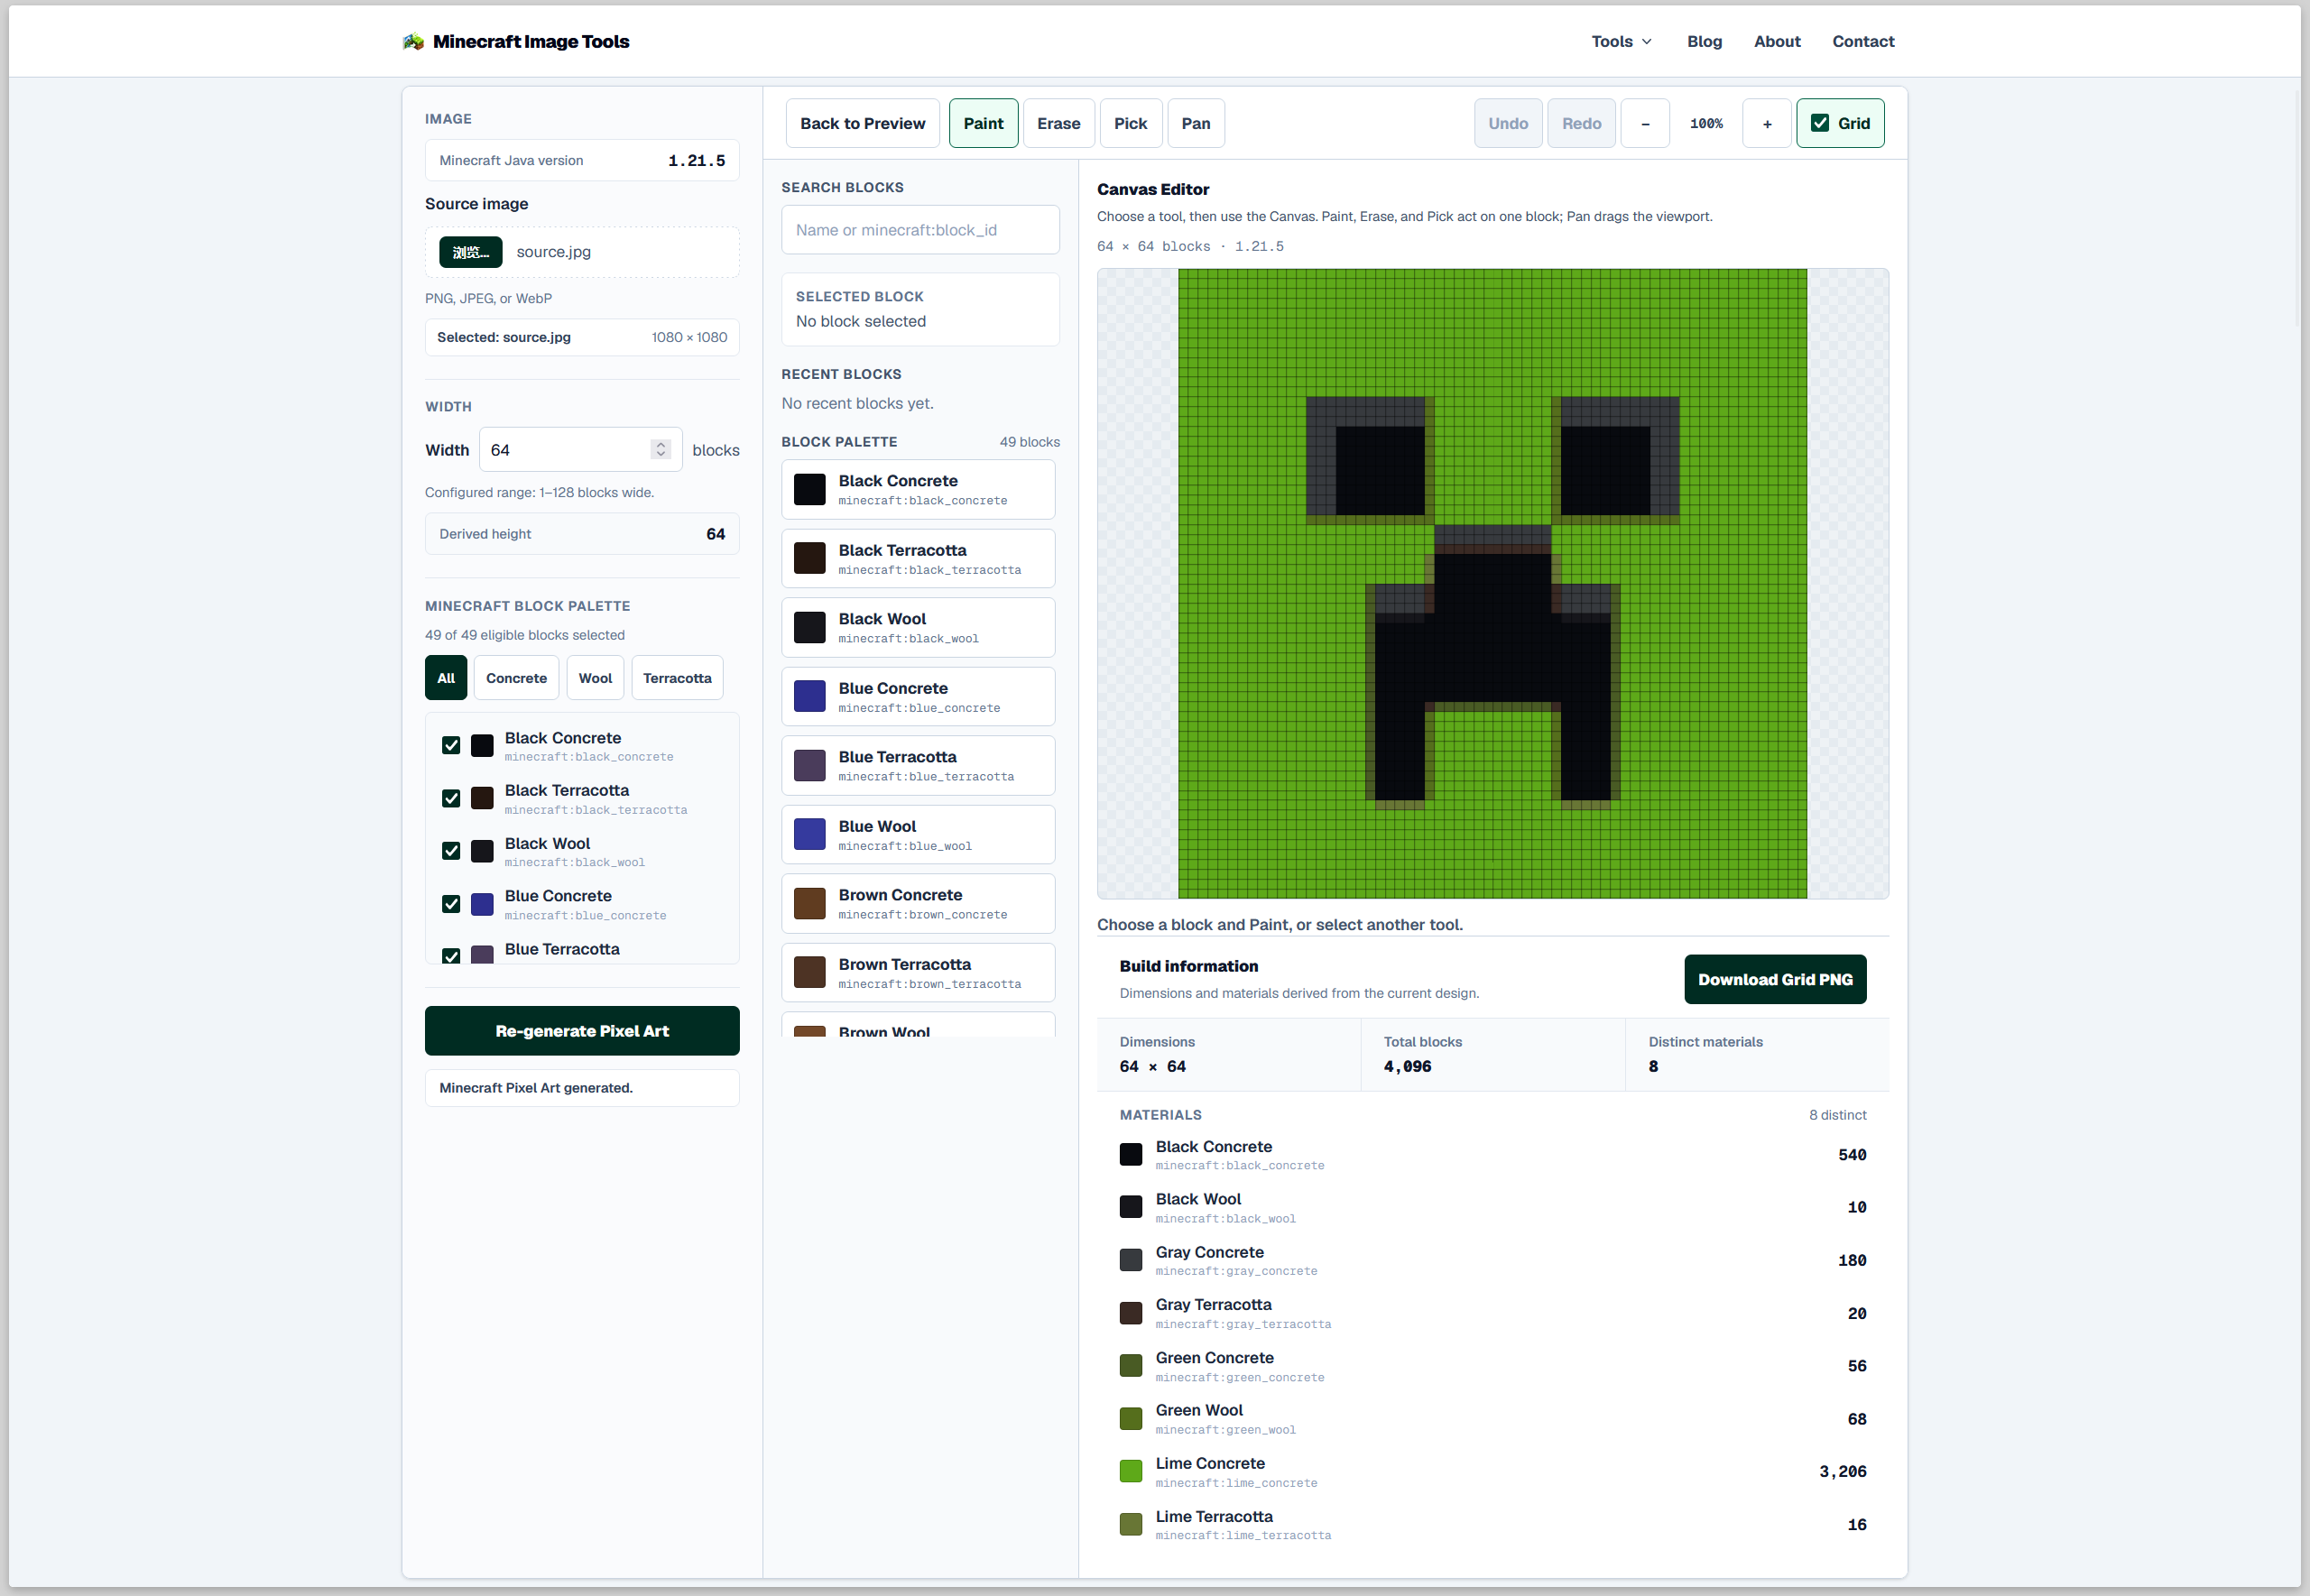
Then zoom in and look for noisy single-block colors, rough outlines, or tiny details that will be awkward to build. Those are the areas worth correcting manually.
For image-based wall art, the Minecraft Pixel Art Generator can be used as the practical conversion step after the source image is prepared.
5. Refine only what improves recognition
Automatic conversion should do most of the work. Manual editing is most useful for important edges, eyes, lettering, borders, narrow objects, and other features where one or two cells can noticeably change the result.
Do not try to reproduce every tiny gradient from the original image. At block scale, clear silhouettes and controlled contrast usually matter more than subtle color differences.
Which Images Work Best for Minecraft Conversion?
The source image has a large effect on the final result. Images with clear shapes and controlled backgrounds are easier to reduce without losing the subject.
Good candidates include logos, sprites, icons, close-cropped portraits, simple illustrations, and landscapes with large color regions. More difficult sources include screenshots packed with interface elements, tiny text, distant subjects, low-contrast scenes, and photos with many small objects competing for attention.
A useful test is to shrink the source image on screen. If you can still recognize the main subject at a small size, it is usually a stronger candidate for block conversion.
Choose Build Size by Recognition, Not Image Resolution
High-resolution source files can be useful for clean edges, but they do not tell you how large the Minecraft build should be. Instead, find the smallest grid that still preserves the features you care about.
For a logo, that may mean keeping the outline and lettering readable. For a portrait, the face shape, eyes, and hairline may matter most. For a landscape, the skyline and major color regions usually matter more than individual leaves or stones.
Start smaller than your maximum available space. Increase the width only when a specific feature disappears. This keeps the project manageable and makes each extra row or column serve a purpose.
Choose the Minecraft Output Before You Convert
The source image may be the same, but Pixel Art and Map Art need different conversion rules. Choose the intended output first so the dimensions, colors, and building reference match the finished project.
For a wall, floor, sign, logo, or mural, use the Minecraft Pixel Art Generator. You choose the design width, the height follows the source proportions, and each design cell becomes a block position that you can edit and review in a Minecraft pixel art grid.
For a single in-game map, use the Minecraft Map Art Generator. It creates one fixed 128 × 128 Java Edition 1.21.5 Flat Map Art design with map-specific colors, block choices, editing, material quantities, and PNG references.
The Minecraft Canvas serves a different starting point: a blank grid for drawing a block design manually. It does not convert an uploaded image. Selecting the right workflow before generation avoids treating wall art, map art, and manual drawing as interchangeable outputs.
Common Minecraft Image Conversion Mistakes
Keeping too much background. Extra background makes the subject smaller after reduction and can add many unnecessary blocks.
Making the first version too large. More cells add detail, but they also increase materials and build time. Use size to solve readability, not as a default quality setting.
Keeping every subtle shade. Photographs contain color differences that may not matter once viewed as a block build. Simplifying similar shades can make the result easier to construct.
Editing before checking the silhouette. Fix the crop, dimensions, and major color regions first. Small cell edits should come later.
Conclusion
A Minecraft image converter is most useful when it turns a picture into a practical build plan: the right dimensions, a controlled palette, a readable grid, and a design that still works when viewed at block scale. Start with a strong crop, choose the smallest useful grid, and refine only the details that improve recognition.
For a wall-art workflow, prepare the image, review the full image to Minecraft pixel art process, and test it in the Minecraft Pixel Art Generator before building. If the finished artwork belongs on one in-game map instead, start with the Minecraft Map Art Generator so the conversion uses the map-specific workflow from the beginning.
FAQ
Can a Minecraft image converter work with any picture?
Most photos and artwork can be reduced to a block grid, but clear subjects and strong shapes usually convert better than crowded or low-contrast images.
How large should I make the converted image?
There is no universal best width. Use the smallest grid that keeps the important features recognizable, then increase the dimensions only when necessary.
Do I need mods to build a converted image?
Not if you are following a visual grid manually. A block-by-block reference can be rebuilt in a normal world. Optional schematic or assisted-placement workflows may require separate tools depending on the file format and game edition.
Can a single photo become a full 3D Minecraft structure?
A single 2D image does not contain complete information about depth, hidden surfaces, or the back of an object. Standard image conversion is therefore better suited to 2D block art and build plans unless additional 3D interpretation is added.
Try the workflow in your browser
Use the current Minecraft Pixel Art Generator with your own image, then edit the result and review its material counts as you follow this guide.
Open Minecraft Pixel Art Generator