
Pixel Art guide
Minecraft Pixel Art Material List: A Practical Build Guide
Learn how to read a Minecraft pixel art material list, check block quantities, compare designs, and plan a more manageable build before construction.
Minecraft Image Tools Team ·
A Minecraft pixel art material list answers a practical question before you place the first block: what do you actually need to gather?
A converted image may look manageable in the preview, but the build can still involve thousands of placements and several materials. Checking the material information before construction helps you judge the real scale of the project, compare design choices, and avoid gathering blocks for a version you later change.
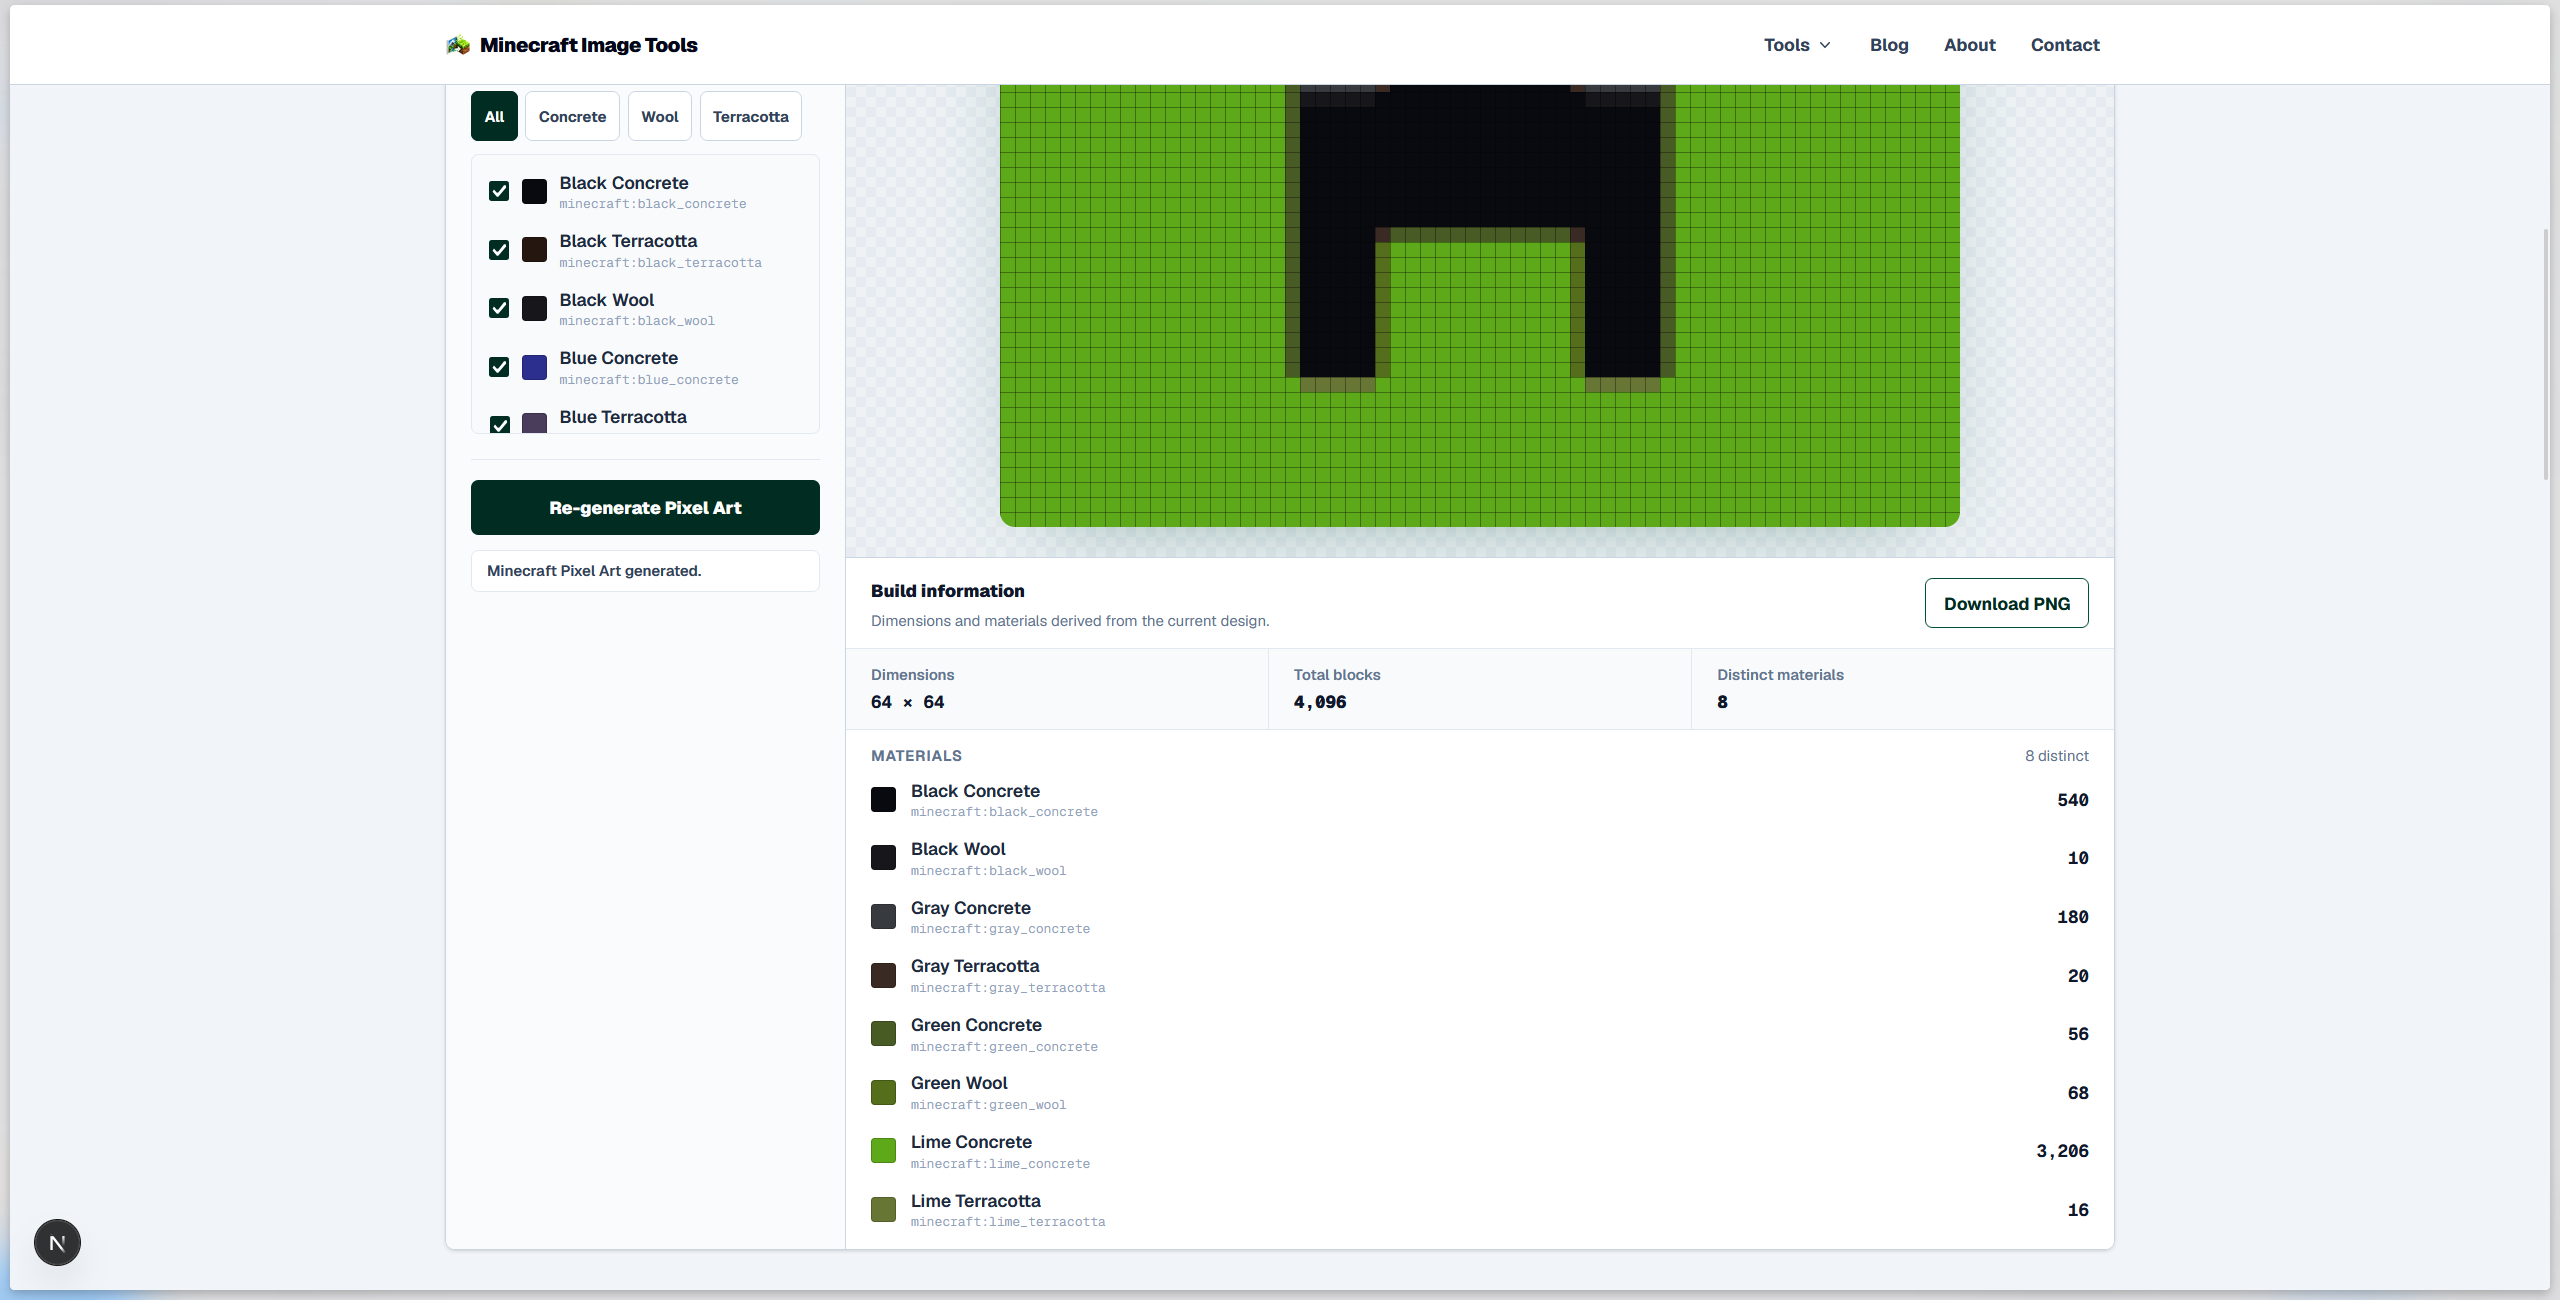
Minecraft Image Tools calculates Build Information from the generated design, including dimensions, total placed blocks, distinct materials, and the quantity of each material. The useful part is not simply having those numbers. It is knowing when to check them and how to use them while refining the design.
What a Minecraft Pixel Art Material List Tells You
A material list is the bridge between the visual design and the physical build.
The preview tells you where colors and shapes appear. The material list tells you how many blocks of each mapped material the finished design uses. In the current Minecraft Image Tools workflow, Build Information reports:
- final design dimensions;
- total placed blocks;
- distinct materials;
- the quantity required for each material.
These values come from the current design rather than from a rough estimate based only on image size. That matters because changing the block palette or editing cells in the Canvas can change the final quantities without changing the overall dimensions.
Two designs can therefore be the same size while requiring different combinations of blocks.
Check the Material List After the Design Is Stable
The easiest mistake is to start gathering too early.
Treat the first generated result as a draft. Before using its quantities as your checklist, confirm that the source image, Width, block palette, and important manual edits are unlikely to change.
A practical order is:
- Upload and generate the image.
- Check whether the subject is readable at the chosen Width.
- Review the selected block palette.
- Correct important cells in the Canvas.
- Check the final Build Information.
- Gather materials from that final version.
If you change the design after step five, review the material list again. The old quantities describe the old design.
Use Total Blocks to Judge Build Scale
The total block count is the quickest way to understand the scale of a flat pixel-art build.
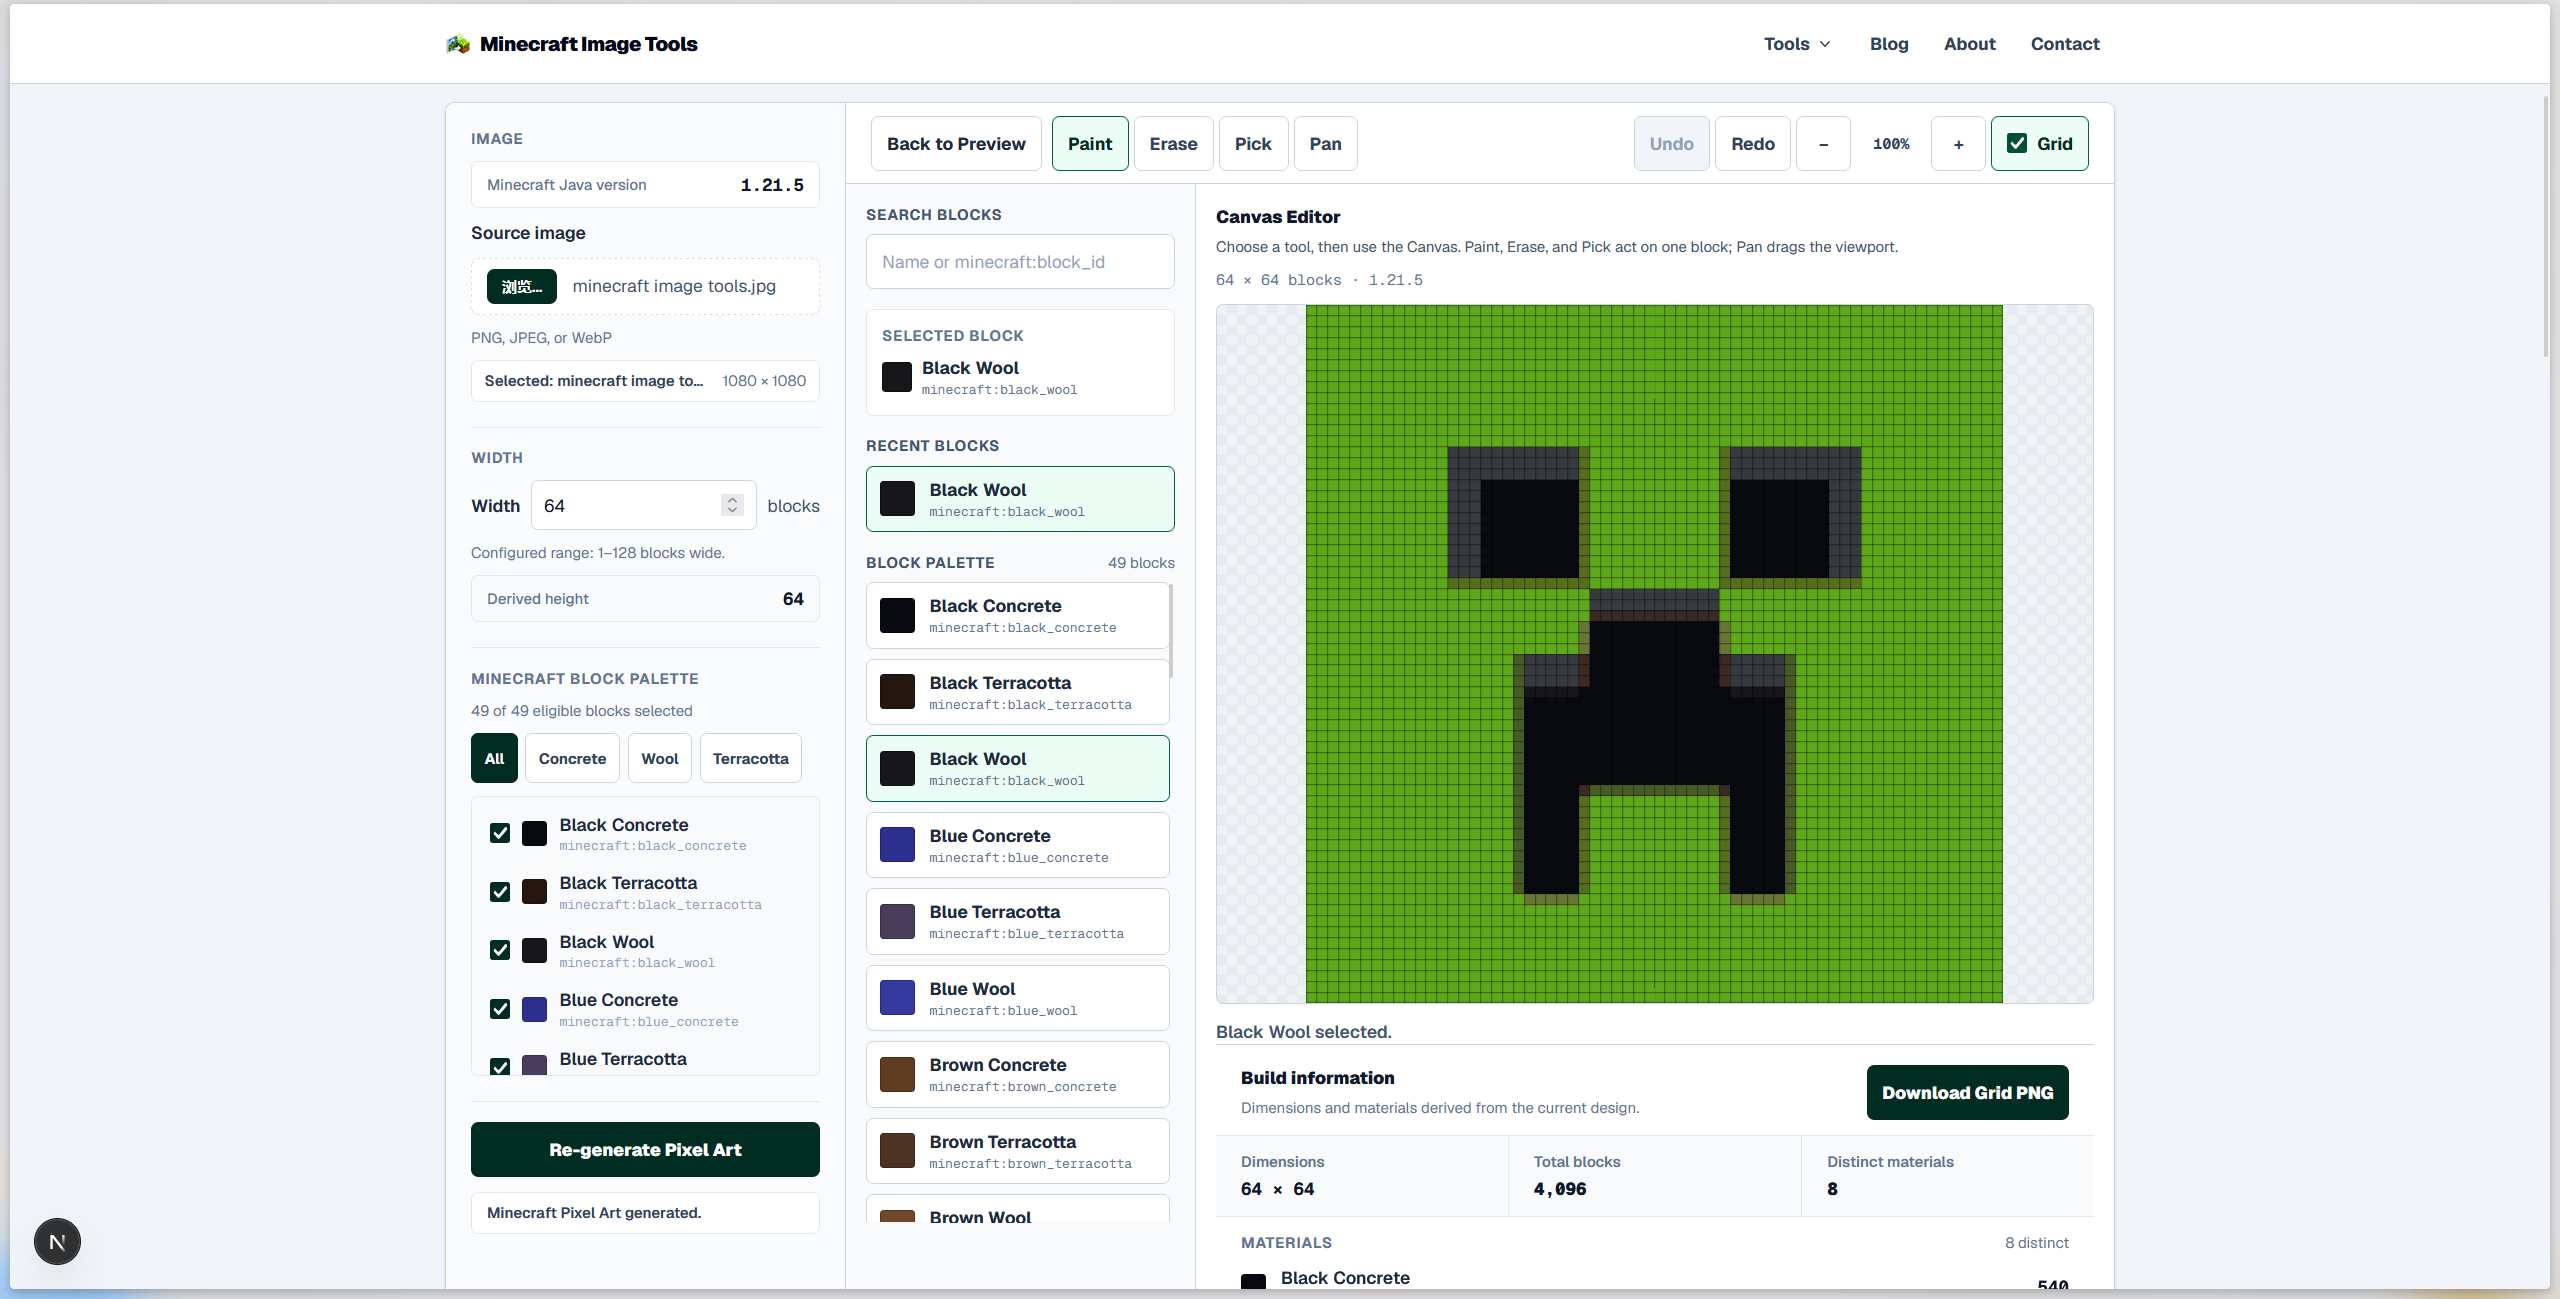
A design can look small on a monitor while representing a large wall in-game. The selected Width and derived Height determine the grid dimensions, while the placed-block total tells you how much construction work the current design contains.
Use that number as a decision point, not as a score to maximize.
If the build feels too large, ask whether the extra resolution preserves details you actually need. A smaller version may remove subtle texture while keeping a face, logo, symbol, or silhouette recognizable.
For a deeper size comparison, use the Minecraft Pixel Art Size Guide.
The goal is the smallest design that still communicates the image clearly at the scale you want to build.
Read Distinct Materials as a Complexity Signal
Total blocks tell you how much you need to place. Distinct materials tell you how many different block types you need to manage.
A design using more materials may reproduce the source more closely, but it can also make gathering and sorting more complicated. A narrower material set may be easier to build even when the total number of blocks stays similar.
That makes the material list useful when comparing palette choices.
Generate with one palette, inspect the result and quantities, then change the palette and generate again. Keep the source image and Width unchanged while comparing. This isolates the effect of the palette.
The Minecraft Pixel Art Block Palette Guide explains that trade-off in more detail.
Remember that the selected palette defines what the mapper may use. The material list shows what the finished design actually uses. Selecting every eligible block does not mean every one will appear in the build.
Prioritize High-Quantity Materials
Once the design is final, scan the quantities before collecting blocks.
The most-used materials deserve attention first because running short on a dominant background or large color region can stop construction quickly. Smaller accent materials still matter, but they usually represent less of the gathering work.
A simple checklist is enough:
- confirm every material in the final design;
- note the quantity of each one;
- gather high-quantity materials first;
- keep smaller accent materials organized separately;
- recheck the final list before building.
The important part is that your checklist comes from the final design rather than from visual guesswork.
Use the Grid and Material List Together
The material list tells you what to gather. The grid tells you where those blocks belong.
When you are ready to build, open the Minecraft Pixel Art Generator with the finalized design and use the Grid while placing blocks. For larger projects, divide the design into sections rather than trying to follow the whole image at once.
The Minecraft Pixel Art Grid guide covers row-by-row reading and ways to reduce counting mistakes.
A simple build workflow is:
- Reserve enough wall or floor space for the final dimensions.
- Gather blocks from the final material quantities.
- Choose a consistent starting corner.
- Follow the grid row by row or section by section.
- Compare completed areas with the preview before continuing.
Recheck Materials After Canvas Edits
Small edits can matter more than they appear to.
Changing a few cells around an outline, eye, letter, or high-contrast feature may improve readability without changing the design size. Those edits can still replace one material with another, so check the final quantities after Canvas work is finished.
Material planning therefore belongs near the end of the workflow:
generate → inspect → edit → verify materials → build
Gathering first and editing later creates avoidable rework.
Common Material-Planning Mistakes
Gathering from the first preview
The first conversion is useful for judging the idea, not necessarily for final planning. Finish size, palette, and edits first.
Looking only at total blocks
Two designs can have similar total sizes but different material complexity. Check both total blocks and distinct materials.
Assuming every selected palette block is required
The palette is the pool of eligible choices. Gather from the generated material quantities, not from the entire palette.
Changing multiple settings at once
If you change Width and palette together, it is harder to understand why the quantities changed. Compare one decision at a time when possible.
Conclusion
A Minecraft pixel art material list is most useful after the design has stopped changing. Use it to confirm the build scale, see how many different materials are involved, and gather the blocks used by the final version instead of estimating from the picture.
Settle the size, finalize the palette, make important Canvas edits, review the quantities, and only then start collecting blocks. That turns the converted image from a visual preview into a practical build plan.
FAQ
What is a Minecraft pixel art material list?
It is a breakdown of the blocks used in a finished pixel-art design and the quantity required for each material. It helps you plan what to gather before building.
Does Minecraft Image Tools show block quantities?
Yes. The current Build Information includes design dimensions, total placed blocks, distinct materials, and the quantity of each material used by the current design.
Should I gather materials before editing the design?
It is better to finalize the design first. Changes to Width, palette, or individual Canvas cells can change the materials and quantities you need.
Does selecting 49 eligible blocks mean my build needs 49 materials?
No. The current reviewed palette provides eligible block choices. The generated material list reflects only the materials actually used by the finished design.
Can the material list tell me where each block goes?
The material list tells you which blocks are needed and in what quantities. Use the Grid and Preview to follow placement while building.
Try the workflow in your browser
Use the current Minecraft Pixel Art Generator with your own image, then edit the result and review its material counts as you follow this guide.
Open Minecraft Pixel Art Generator